Preparation and Ingredients
Choosing the Right Ingredients
Selecting the Best Peanut Butter: Smooth vs. Chunky
When it comes to crafting the perfect peanut butter balls, the type of peanut butter you use can make a significant difference. Smooth peanut butter offers a creamy texture that mixes well with other ingredients and creates a uniform appearance. On the other hand, chunky peanut butter provides little bites of peanuts within the balls, adding a delightful crunch. The choice depends on your texture preference and whether you enjoy a bit of crunch in your treats.
Choosing the Chocolate for Coating: Dark, Milk, or White Chocolate
Choosing the right chocolate for coating your peanut butter balls is crucial because it contributes significantly to the final taste. Dark chocolate is ideal for those who prefer a less sweet, more robust chocolate flavor. Milk chocolate offers a creamier, sweeter coating, which complements the salty notes of the peanut butter. Lastly, white chocolate provides a rich, sweet contrast, making the balls look and taste decadent. Each type of chocolate also affects the aesthetic appeal of your peanut butter balls, allowing for a range of looks from elegant to playful.
Essential Tools and Equipment
Mixing Bowls and Spoons: Size and Material Considerations
For effective mixing of your peanut butter ball ingredients, choosing the right bowls and spoons is essential. Opt for large mixing bowls made of stainless steel or glass, as they are easier to clean and do not retain odors. When it comes to mixing spoons, choose sturdy ones that can handle thick mixtures without bending.
Refrigerating and Freezing Requirements: Optimal Temperatures for Setting
To ensure your peanut butter balls set correctly after shaping, understanding the optimal refrigerating and freezing temperatures is key. The peanut butter mixture should be chilled at around 32°F (0°C) to quickly firm up without freezing. If you choose to freeze them, ensure the temperature is set at about 0°F (-18°C) for a quicker setting time and easier coating process.
Pre-Mixing Setup
Measuring Ingredients: Accuracy and Proportions
Accurately measuring your ingredients is crucial to achieving the perfect texture and taste of your peanut butter balls. Use measuring cups and spoons for precise proportions, as this will ensure consistency in flavor and texture across all your peanut butter balls.
Preparing the Workspace: Cleanliness and Arrangement
Start with a clean and organized workspace to make the process smoother and more enjoyable. Ensure all necessary tools and ingredients are within easy reach and that your surface is clean to prevent any contamination. A well-set workspace not only helps in efficient cooking but also makes the cleaning up process faster.
In conclusion, good preparation is the solid foundation you need for making delicious peanut butter balls. Choosing the right ingredients and tools, along with a well-prepared workspace, sets you up for success in the subsequent steps of the cooking process.
Making the Peanut Butter Balls
Mixing Ingredients
Combining Peanut Butter and Binders
When crafting your peanut butter balls, the first step is mixing the correct binders with your selected peanut butter. Typically, this involves combining smooth or chunky peanut butter with powdered sugar and a modest amount of softened butter to achieve a firm yet pliable consistency. This mixture forms the base of your balls and ensures they hold shape while still being deliciously creamy. Ensure the butter is well-integrated to avoid any oily pockets and to maintain uniformity in texture.
Optional Mix-Ins
For those wanting a bit of extra crunch or variety, mixing in additional elements like crushed nuts or Rice Krispies can be delightful. These add-ons not only introduce a textural contrast but can also enhance the overall flavor profile. Depending on personal preference, you may choose how much or how little to include, but remember, the primary taste should still come from the peanut butter.
Shaping and Cooling
Forming Balls
Once your mixture is ready, it’s time to roll them into balls. Consistency is key here – aim for each ball to be the same size to ensure even cooling and coating later on. A small ice cream scoop or a spoon can be an excellent tool for scooping uniform amounts. Roll them with your hands to achieve a smooth surface.
Cooling Before Coating
Before moving on to the chocolate coating, the peanut butter balls need to be sufficiently cooled. This step is crucial because it prevents the balls from falling apart when dipped in warm chocolate. Typically, placing them in the refrigerator for at least an hour or until they are firm works best. The colder they are, the easier the next step will be.
Chocolate Coating
Melting the Chocolate
Melting chocolate can be tricky, but with the right technique, it can be a smooth process. You can melt chocolate using a double boiler or a microwave. If using a microwave, be sure to stir the chocolate at 20-30 second intervals to avoid burning it. The chocolate should be smooth and glossy, indicating it is ready for dipping.
Dipping and Coating Techniques
Dipping the peanut butter balls in chocolate requires a gentle touch. Using two forks, dip each ball into the melted chocolate and turn it until it’s fully covered. Gently tap the fork on the side of your bowl to shake off excess chocolate. This helps achieve a thin, even layer around each ball. Place them on a parchment-lined tray and ensure they don’t touch each other to prevent them from sticking together.
By following these steps, you’re sure to create delicious, mouth-watering peanut butter balls that look as good as they taste. Stay tuned for the final touches and storage tips in the next section of our guide!
Finishing Touches and Storage
Decorating Your Peanut Butter Balls
Topping Variations
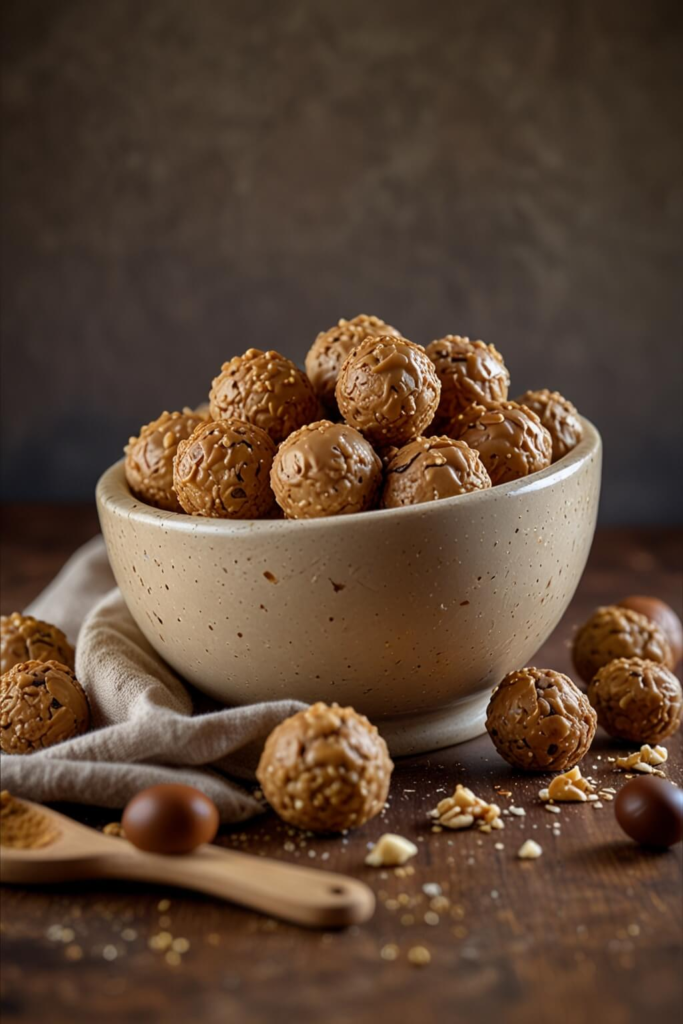
Now that your peanut butter balls are coated and set, it’s time to give them an eye-catching finish. For an extra touch of flavor and texture, consider sprinkling sea salt lightly over the chocolate before it hardens; this not only enhances taste but also balances sweetness. Crushed nuts provide a delightful crunch and can be gently pressed into the chocolate coating. Finally, artistic chocolate drizzles in a contrasting color (such as white chocolate on dark chocolate coating) not only look spectacular but also add a layer of rich taste.
Creative Presentation Ideas
Presentation can transform your peanut butter balls from a simple treat to an unforgettable gift or party favor. For seasonal themes, try using colored sprinkles that match the holiday – red and green for Christmas, pastels for Easter, or orange and black for Halloween. Also, consider placing your peanut butter balls in miniature cupcake liners and arranging them in a themed gift box or basket. This simple step significantly enhances their appeal, making them perfect gifts or party contributions.
Storage Tips
Storing for Freshness
Proper storage is crucial for maintaining the freshness and texture of your peanut butter balls. Firstly, they should be stored in an airtight container to prevent them from absorbing odors from the refrigerator. Plastic containers with tight seals or even zipper bags work well for this purpose. Keep them in a cool, dark area of the fridge to avoid any melting issues.
Long-Term Storage
If you’ve made a large batch and want to save some for later, freezing is an excellent option. Place the peanut butter balls on a baking sheet lined with parchment paper and freeze them until firm. Once hardened, transfer them to a freezer-safe bag or container. This method prevents them from sticking together and allows for easy portioning. They can be enjoyed for up to three months when frozen. Simply let them thaw at room temperature for a few minutes before serving.
Serving Suggestions
Pairing with Beverages
Peanut butter balls pair wonderfully with various beverages. A cup of hot coffee or a glass of milk complements the rich, creamy texture of the dessert, making for a perfect breakfast or afternoon snack. For those who prefer a lighter touch, a delicate tea can balance the sweetness and richness of the chocolate and peanut butter.
Occasions and Serving Sizes
Peanut butter balls are extremely adaptable, suitable for large gatherings or as a personal treat. For parties, consider serving them in small paper cups for easy handling by guests. During more intimate gatherings, a nicely arranged platter on the coffee table works wonderfully, allowing guests to help themselves. When considering serving sizes, remember that these treats are quite rich, so one or two per person is usually sufficient.
In conclusion, with these finishing touches and proper storage, your peanut butter balls will not only taste delicious but also captivate your guests’ attention with their delightful presentation. Enjoy crafting these wonderful treats that are sure to be a hit on any occasion!


