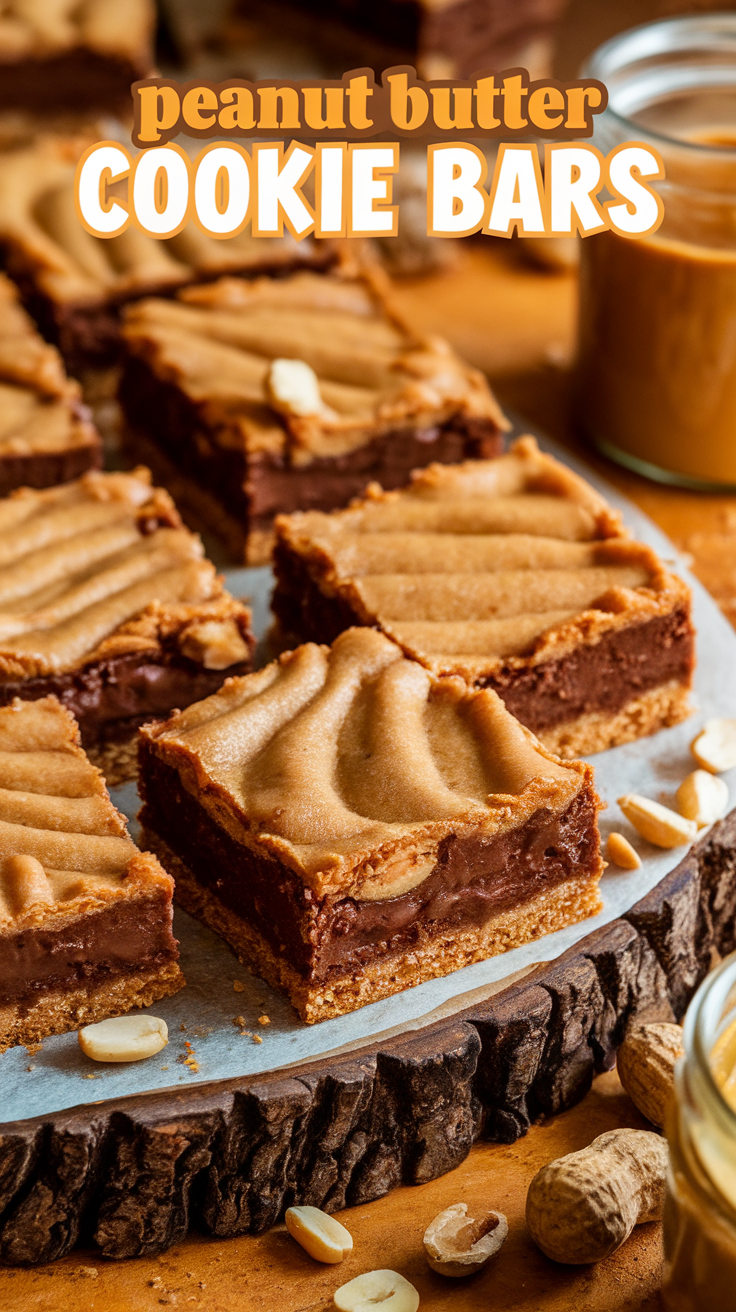
Peanut Butter Cookie Bars are the sweet treat you’ve been craving! These bars bring together the irresistible flavors of creamy peanut butter and brown sugar, resulting in a chewy, delicious dessert that’s perfect for sharing. With minimal effort required, they’re ideal for busy weeknights or last-minute get-togethers!

Table of Contents
- Peanut Butter Cookie Bars Recipe
- Ingredients for Peanut Butter Cookie Bars
- How to Make Peanut Butter Cookie Bars
- Tips for Making Peanut Butter Cookie Bars
- Make-Ahead Instructions
- Storing Leftovers
- Freezing Peanut Butter Cookie Bars
- Reheating Peanut Butter Cookie Bars
- Serving Suggestions
- FAQs
- Try these Peanut Butter Cookie Bars related recipes next!
- Easy Chocolate Chip Cookie Bars
- Brownie Cookie Bars
- No-Bake Peanut Butter Bars
- Peanut Butter Brownies
Peanut Butter Cookie Bars Recipe
- Quick and Simple. These cookie bars require minimal prep time and are easy to make, making them ideal for those busy days when you want something sweet without the fuss.
- Decadent Flavor. The blend of peanut butter and brown sugar creates a rich, sweet flavor profile that satisfies any sweet tooth, perfect for kids and adults alike!
Ingredients for Peanut Butter Cookie Bars

- Peanut Butter: Provides the main flavor. Use creamy or crunchy depending on your preference.
- Brown Sugar: Adds sweetness and moisture to the bars; light or dark brown sugar works well.
- Butter: Creates a rich, chewy texture along with flavor. Use unsalted butter for the best results.
- Flour: The base ingredient for structure; all-purpose flour is the best choice.
- Egg: Binds everything together and adds moisture to the bars.
- Baking Soda: Helps the bars rise. Ensure it’s fresh for maximum effectiveness.
- Salt: Enhances the flavor of the peanut butter and balances the sweetness.
- Vanilla Extract: Adds a warm, aromatic note to the bars, heightening the flavor profile.
How to Make Peanut Butter Cookie Bars

- Preheat your oven to 350°F (175°C) and grease a 9×13 inch baking pan or line it with parchment paper for easy removal.
- In a mixing bowl, cream together the peanut butter and butter until smooth and fluffy.
- Add the brown sugar, egg, and vanilla extract, and mix until well combined.
- In a separate bowl, whisk together the flour, baking soda, and salt.
- Gradually add the dry ingredients to the wet ingredients, mixing until just combined.
- Spread the mixture evenly in the prepared baking pan, smoothing the top with a spatula.
- Bake in the preheated oven for about 20-25 minutes or until golden brown and a toothpick inserted comes out clean.
- Allow the cookie bars to cool in the pan before cutting them into squares or rectangles and serving.
Tips for Making Peanut Butter Cookie Bars
- Use Room Temperature Ingredients: Bringing your butter and egg to room temperature ensures smoother mixing, yielding better texture.
- Optional Mix-Ins: Feel free to add chocolate chips, chopped nuts, or even swirls of Nutella for extra flavor and texture!
- Check for Doneness: Every oven is different; start checking at the 20-minute mark to prevent over-baking.
Make-Ahead Instructions
- You can prepare the dough in advance and store it in the refrigerator for up to 24 hours before baking.
- Baked cookie bars can also be stored in an airtight container at room temperature for up to one week, making them an easy treat to have on hand.
Storing Leftovers
Store leftover Peanut Butter Cookie Bars in an airtight container at room temperature for up to 5 days. For optimal freshness, you may also store them in the fridge.
Freezing Peanut Butter Cookie Bars
- To freeze, wrap the cookie bars tightly in plastic wrap or aluminum foil and place them in a freezer-friendly bag or container.
- They can be frozen for up to 3 months. Thaw in the fridge or at room temperature before serving.
Reheating Peanut Butter Cookie Bars
- To reheat, place the cookie bars in the microwave for about 10-15 seconds or until just warmed through.
- Alternatively, you can reheat them in a 300°F (150°C) oven for about 5-10 minutes for a freshly baked taste!
Serving Suggestions
FAQs
Can I use natural peanut butter?
Yes, just ensure it is well-stirred as natural peanut butter can sometimes separate.
How do I make these bars gluten-free?
You can substitute all-purpose flour with a gluten-free flour blend for gluten-free cookie bars.
Can I add chocolate chips?
Absolutely! Stir in about a cup of chocolate chips for an even more decadent treat.
How do I know when they are done baking?
These bars are done when the center is set and the edges are lightly golden. A toothpick inserted should come out clean.
Can I double the recipe?
Yes, simply double all the ingredients and use a larger baking pan to accommodate the increased volume.