Preparing Your Parsnips
When it comes to creating a delectable dish of honey-glazed roasted parsnips, the preparation stages are crucial. Let’s delve into how to select, prep, and marinate your parsnips to guarantee the best roasting results.
Selecting the Right Parsnips
Choosing the Freshest
Freshness is key when picking parsnips from your local market or grocery store. Look for firm parsnips with smooth, unblemished skins. Avoid those that are limp or have started to brown, as these signs might indicate age and a lack of crispness when cooked.
Understanding Sizes and Shapes
Parsnips come in various sizes and shapes, which can significantly affect their cooking performance. Smaller parsnips tend to be sweeter and more tender, ideal for quicker roasting. Larger ones, however, may require a longer cooking time but offer a robust flavor profile. Consistency in size helps in ensuring even cooking and texture in your dish.
Prepping for Roasting
Cleaning and Peeling
Start by thoroughly washing your parsnips under cold water to remove any dirt or residues. Using a vegetable peeler, strip away the outer skin to reveal the fresh flesh underneath. This step is essential as the skin can sometimes be tough and bitter, detracting from the overall texture of your dish.
Cutting for Optimal Roasting
To promote even cooking and optimal flavor, cut the parsnips into uniform pieces. Halve them lengthwise and then chop them into smaller segments, approximately the same size. This ensures that each piece roasts at the same rate and achieves a uniform caramelization.
Marinating the Parsnips
Creating the Marinade
A simple yet flavorful marinade can elevate the natural sweetness of the parsnips. Combine high-quality olive oil and honey in a ratio of three parts oil to one part honey. Add a touch of salt and freshly ground black pepper to taste. This marinade not only enhances flavor but also helps in achieving a golden, crispy finish.
Marination Time
For the best results, let the parsnips marinate for at least 30 minutes before roasting. If time allows, marinating them for a couple of hours in the refrigerator can deepen the flavors even more. Remember to bring them back to room temperature before roasting to ensure they cook evenly.
By following these detailed preparation steps, your parsnips will be perfectly seasoned and ready to roast, setting the stage for a beautifully caramelized and flavorful dish. Next, we will explore the roasting and glazing techniques to further enhance your culinary creation.
Part II: Roasting and Glazing
Roasting parsnips transforms them into a caramelized delight, and applying the perfect glaze brings out their natural sweetness. Below, we provide detailed steps for achieving that irresistible combination of crispy texture and rich flavor in honey-glazed roasted parsnips.
Roasting the Parsnips
Setting the Oven
Before you begin, ensure your oven is set to the right temperature. Preheat your oven to 425°F (220°C), which provides the heat required to roast the parsnips thoroughly and achieve a crisp exterior. Preheating is crucial; that initial blast of high heat helps to kick start the caramelization process.
Roasting Techniques
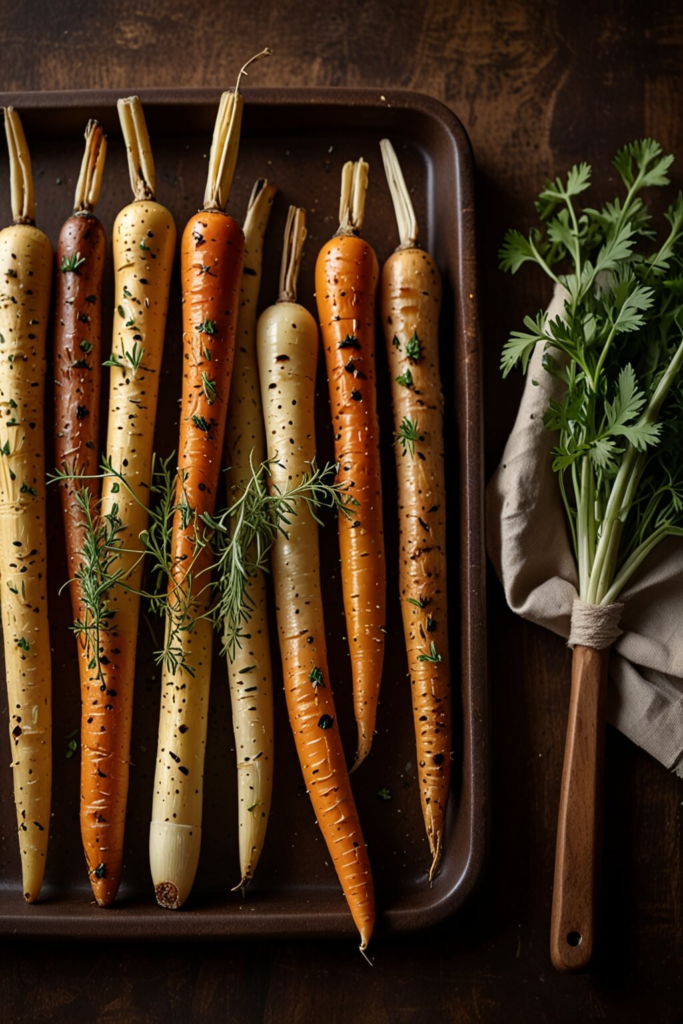
For a perfect roast, spread the marinated parsnips in a single layer on a baking sheet lined with parchment paper. This will help them roast evenly without sticking. Roast them for about 20 to 25 minutes, turning them halfway through to ensure all sides get a nice golden-brown hue. Watch them closely; the sugars in the honey can cause the parsnips to darken quickly.
Applying the Honey Glaze
Mixing the Glaze
In a small bowl, mix together a quarter cup of honey with a teaspoon each of cinnamon and nutmeg, which adds a warm spiciness to the glaze. Whisk these ingredients vigorously to ensure they are well combined and smooth.
Timing for Glazing
After the parsnips have roasted for 15 minutes and are beginning to soften and brown, brush them generously with the honey mixture. Return them to the oven for the remaining 10 minutes, allowing the glaze to bubble up and adhere to the surfaces of the parsnips, creating a glossy, sticky finish.
Adding the Secret Crunch
Choosing the Right Additive
To add an unexpected textural element to your dish, opt for roughly chopped pecans or almonds. These nuts provide a delightful crunch and nutty flavor that complements the sweetness of the parsnips beautifully.
Incorporation Techniques
Five minutes before your parsnips are done, sprinkle the chopped nuts over them, ensuring they are spread out evenly. This last-minute addition ensures the nuts retain their crunch and don’t become soggy from prolonged exposure to the heat.
By following these steps, you will enhance the natural sweetness of parsnips while adding layers of flavor and texture that make this dish truly special. Stick around for Part III, where we will discuss how to finish, serve, and add the final touches to your roasted parsnips, enhancing them with sauces and additional toppings for a visually appealing and delicious dish.
Finishing and Serving Honey-Glazed Roasted Parsnips
Part III of our tutorial focuses on bringing our honey-glazed roasted parsnips to perfection and serving them with style. The final steps ensure the parsnips are deliciously crispy and beautifully presented, turning a simple root vegetable into the star of your dining table.
Final Roasting Stage
Achieving Desired Crispness
To obtain that perfect crisp texture, it’s crucial to monitor the parsnips during the last minutes of roasting. Look for a golden-brown color and a crispy surface. If the parsnips aren’t crisping as desired, try increasing the oven temperature slightly for the last few minutes. However, keep an eye on them to avoid burning.
Adjustments Before Serving
Once out of the oven, give the parsnips a quick taste. Are they seasoned well? Do they need a touch more salt or a quick drizzle of honey? Making these last-minute adjustments according to your taste can make all the difference. Allow them to rest for a couple of minutes before serving; this not only cools them down to a palatable temperature but also gives the exterior a chance to settle into its crispy texture.
Plating the Dish
Presentation Tips
Consider the visual appeal when serving. Arrange the parsnips on a warm, neutral-colored plate to make the colors pop. Overlap them slightly for a look of abundance, and drizzle lightly with the remaining glaze for an extra sheen.
Pairing Suggestions
These luscious parsnips pair wonderfully with roasted meats, especially pork and chicken. For a vegetarian option, serve alongside a creamy risotto or a fresh green salad tossed with a light vinaigrette to contrast the sweetness of the honey glaze.
Additional Toppings and Sauces
Sauce Options
A light, herby yogurt sauce can complement the sweetness of the parsnips. Simply mix a dollop of yogurt with chopped herbs like parsley or dill, a squeeze of lemon for brightness, and a touch of garlic for depth.
Topping Ideas
For an added element of texture and flavor, sprinkle toasted, chopped nuts such as pecans or walnuts over the parsnips right before serving. This not only adds crunch but also an earthy note that pairs well with the root vegetable’s natural flavors.
Finally, the successful preparation of honey-glazed roasted parsnips lies in the little details. Therefore, don’t hesitate to experiment with flavors and textures that cater to your personal taste. With these final touches, your dish is sure to impress, offering a perfect blend of savory sweetness and satisfying crunch. Enjoy your meal!
By following these detailed steps and suggestions, you will elevate a simple dish into a memorable culinary experience. Happy cooking!


